This is what I mean by pinned drawers. A drawer does not have to be dovetailed to showcase craftsmanship although that is what tradition is. Pins can just be just as elegant and still be strong.


 I have not totally abandoned the Incra1000SE fence system. For really precision work, I use it exclusively with the Incra Miter Sled shown here. This is my go to system for making rails and stiles on raised panel cabinet doors to make perfectly repeatable square cuts. The Incra stop is superior to the Kreg in one aspect, the ability to position the stop precisely against the table saw blade since it has micro-adjusters on the stop. The miter angles can be set to increments 1/10th of 1 degree using a vernier on the miter gauge. But like I said in the previous post, my everyday fence is the Kreg, except for when I really need to be precise in which case, this is the system I go to.

 My go to miter fence for everyday work is a cobbled up combination of the Kreg fence and an Incra V27 miter gauge. The great thing about the Kreg is about the ability to mount a sacrificial wood fence which reduces tearout and backs up small pieces. The wood fence comes in handy in registering where the saw cut will be by the fresh saw cut on the sacrificial wood fence. You can also mount a wood fence on the Incra Miter1000 but the stop does not work well with it. The Kreg stop is designed to accomodate a sacrificial wood fence. Notice on the left is a saw horse which is adjustable to the height of the saw table. It has an UHMW plastic top which aids in sliding large pieces across the table.
 The router table box I built in 2008 has worked great. I just needed a home for the collet wrench and so I built an outside pocket. The doors are also quicker to remove to make adjustments. I removed the thumbscrews and replaced it with wooden latches. There is no substitute for a straight and solid fence for most every day routing tasks. I have a special fence for the large blades used in making raised panel cabinet doors. You are probably wondering - why build a box? Anyway, there is a 4 inch vacuum line connected to my dust collector. The fence also has a port for a 2 inch vacuum hose found on most shop vacs. I really haven't found the necessity to connect the shop vac. The box mounted vacuum works that well.
 The inside section is getting a little crammed. There is a holder which I built for the jack plane. Also the Stanley Bailey #4 smoother has a new rosewood handle. There is also a new Titemark marking gage on the door. The dovetail drawers a.re full of little treasures like a Lie-Nielsen dovetail marking gage and rosewood handled marking knives. The top shelf has a Rob Cosman dovetail saw inside the box jointed walnut box. You cant see it very well but there is a set of Kirsch chisels on the inside portion of the right outside door. See my September 2008 blog post for the initial look at this tool cabinet.

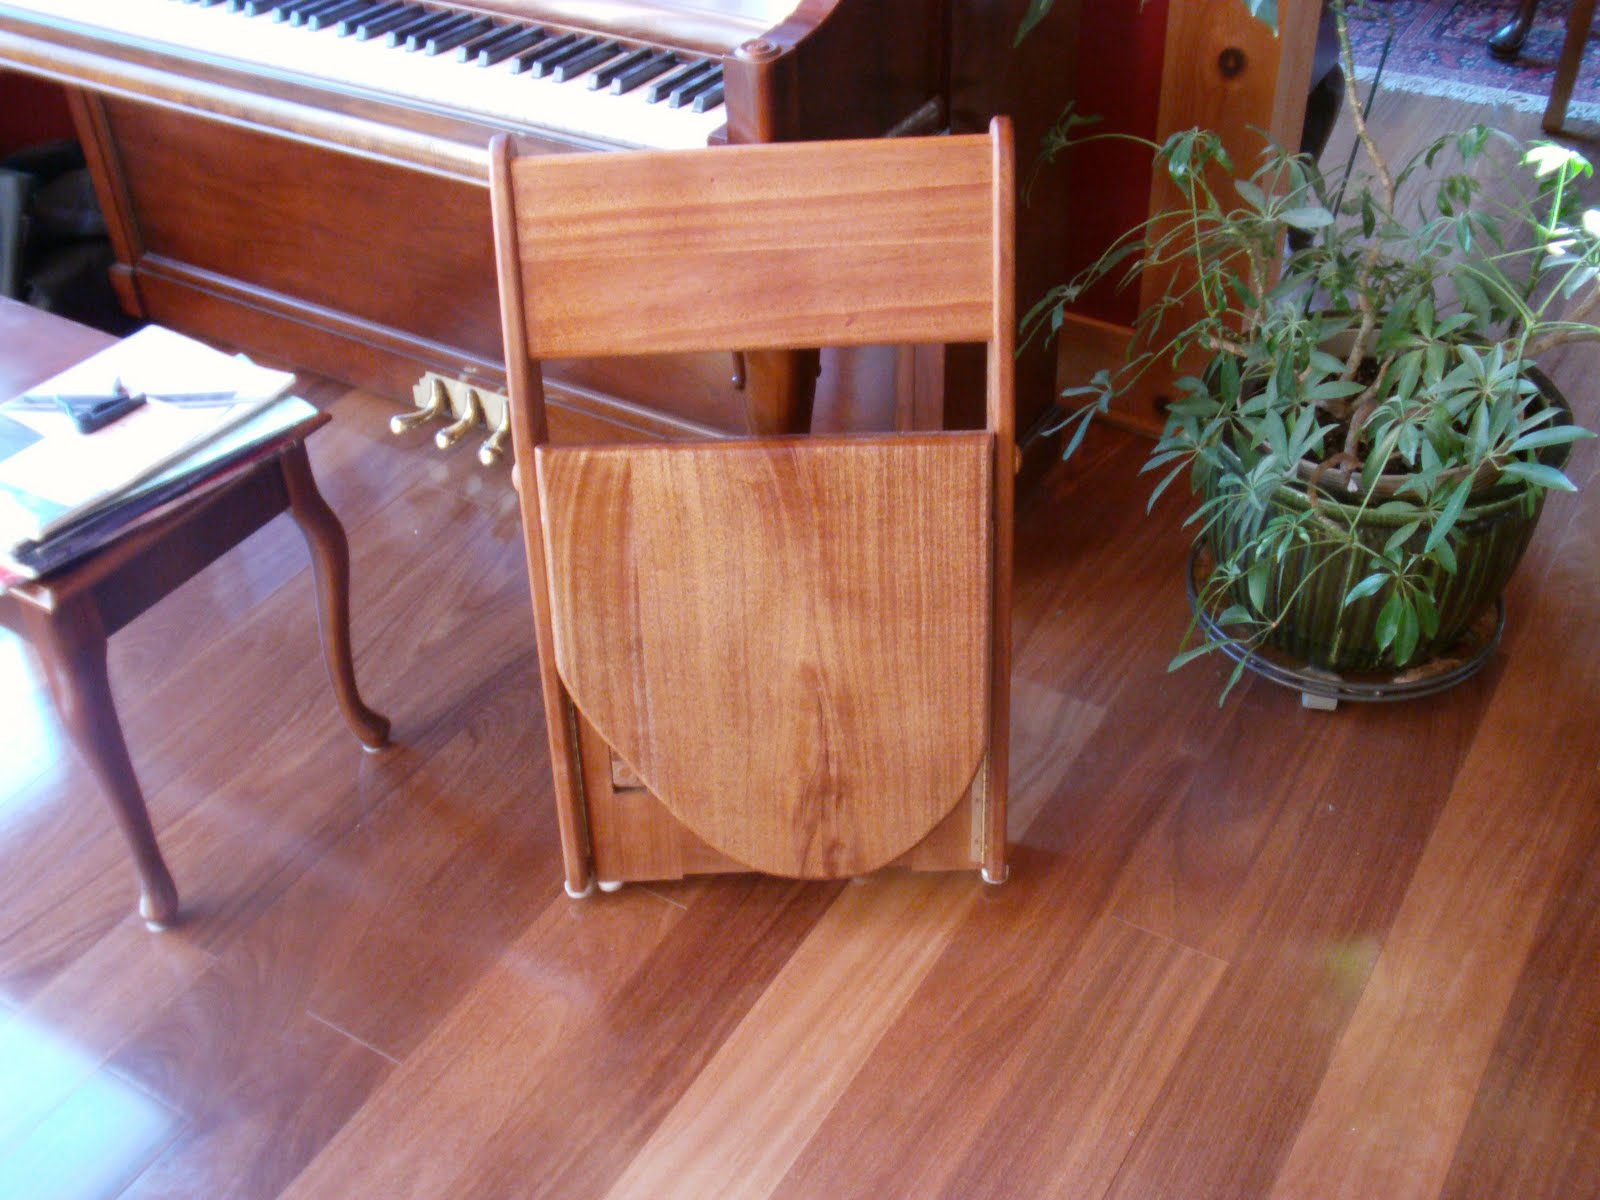 This is the guitar chair in the folded position. It folds flat to a thickness of about 5 inches. The wood is mahogany and it is finished in Danish oil.
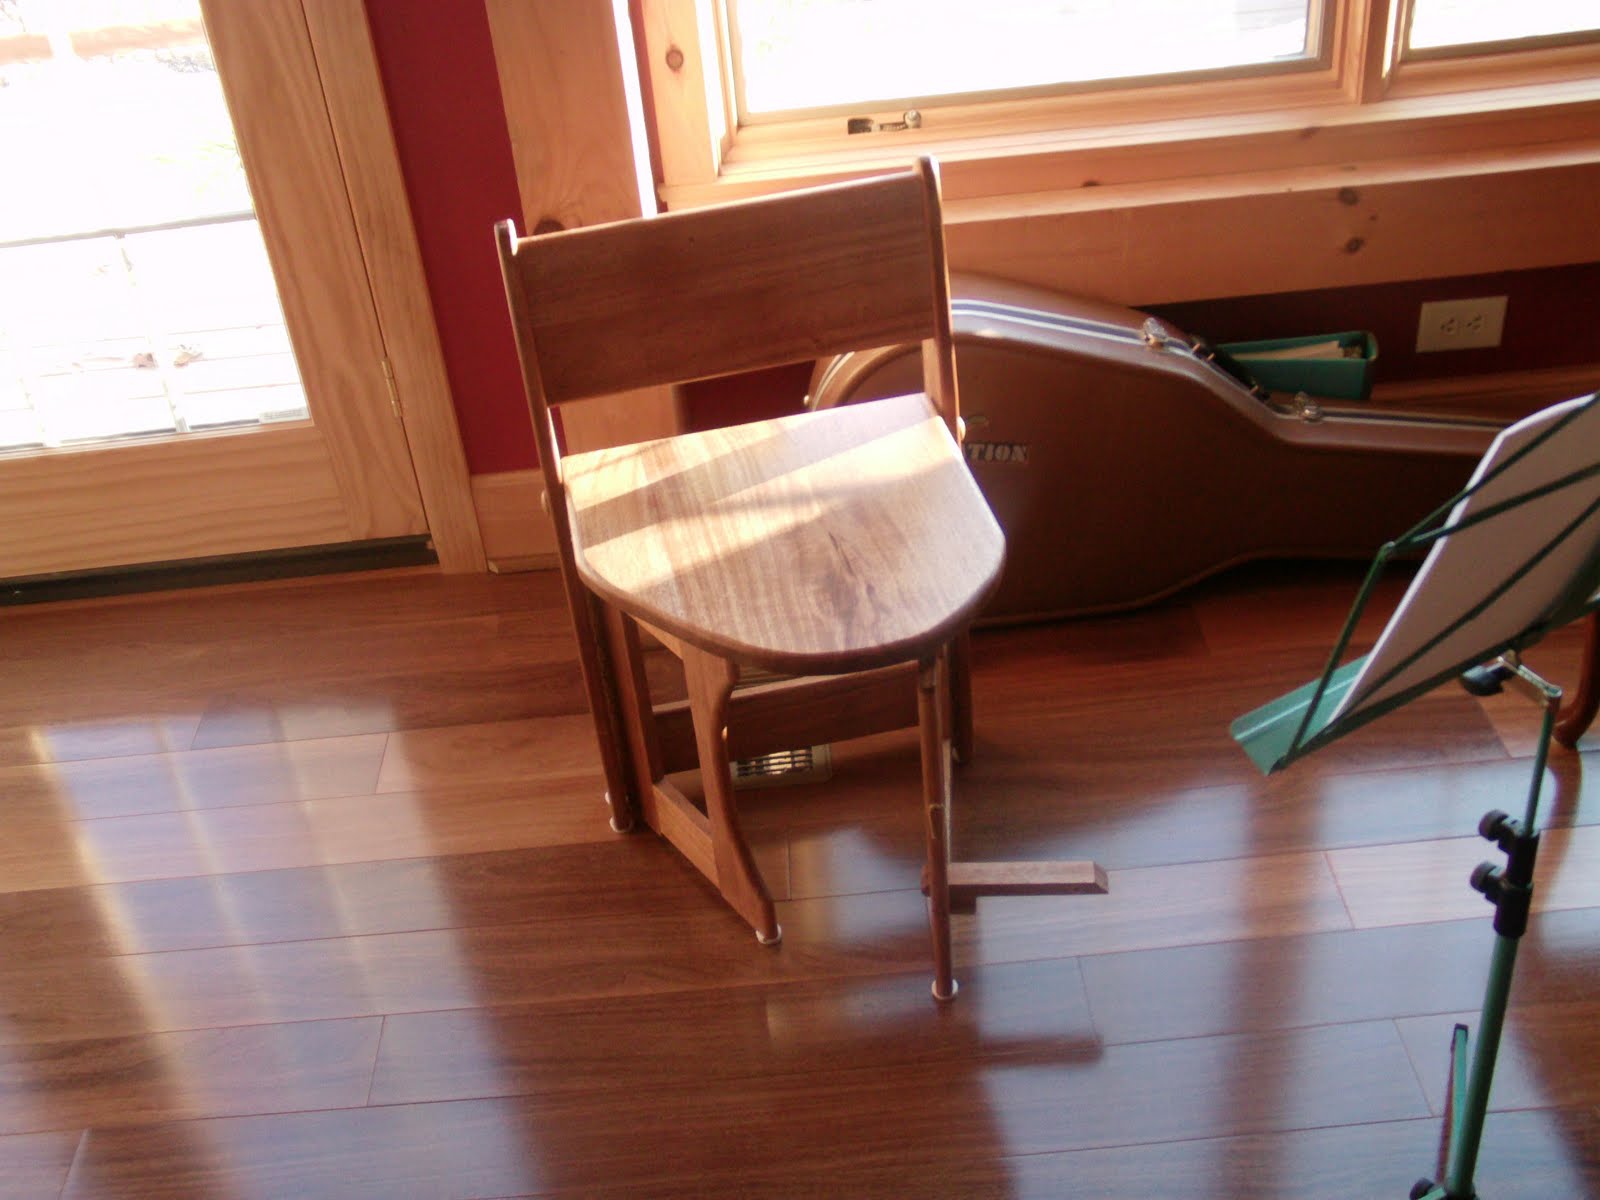 It has been a while since I posted status on any new project. This is a project I embarked on a few months ago. I have been searching the internet for a folding guitar chair that I can use for playing classical guitar. I found one and built a prototype out o plywood just to see how well it worked. I was disappointed. It was unstable because it has only a swing out leg. I proceeded to build a prototype with two swing out legs and with 4 points of support it is a LOT more stable. Also a feature I added is a fold out leg support which is a substitute for using a footstool. It raises the left leg the same height as my custom built footstool. For you guitarists out there looking for a unique chair on which you can practice for hours, this might be the one. The back is sloped to support the lower lumbar area. The seat is cutaway to facilitate lowering the right leg for that classic position.
 With the top up, the top and press are solidly locked into the legs. The back is screwed to studs on the wall to take the leverage of the press. All the supplies are handily reachable from reloading manuals, dies and so forth.

 Finally finished the French Door that I built for the master bedroom. The rails, stiles and panels are all from select pine.
 Finally finished the drawers for my tool cabinet. The drawer fronts are cherry - no stain - just tung oil. The drawer runners are cherry as well. the drawer sides are poplar.
 Freshly stocked with plywood and african mahogany boards ready for projects. A 200 psi 17 gal compressor is in the background along with a wall mounted back.
 The left corner has the planer - a Ridgid 4330, A Delta US made bandsaw - yes US made. Towards the back is rolling clamp rack (home made) and it contains a lot of clamps. To the right is a 1.5 hp dust collector. Against the wall are shelves for screws, router bits and power hand tools.